Thursday 29 September 2016

Kids Calendar- DIY 5 min cardboard craft.

Hi Crafters,

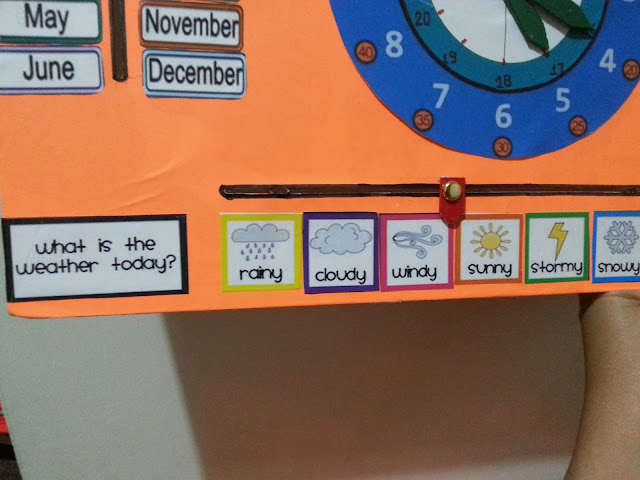
Here is my new cardboard calendar with days, months of the year, days of the week, temperature, weather and seasons. Very useful for younger ones, my sons loved it.
Here is a full view of calendar.


Calendar with lots of features
Dates of the months


Things you need:-

Printouts of your choice
Scissors
Glue stick
Cardboard
Split pins 
Punching machine
Craft knife
Ruler


Print outs
Scissors
Split pins


Months of the year

Weather


Days of the week


Temperature


Season


Back side of the calendar


Thanks for looking.


Sunday 17 April 2016

Cardboard Spiderman table for kids, DIY

Hi crafters,

Time flies, My DS has already started his schools, that means gradually he will be doing more sitting, more writing and more reading...hence time to do something big and really useful, so we ended up the idea of making a big table and decided to use his other cardboard table (I posted earlier on) for messy works like- crafts, paintings etc.


The plan was to make a table which requires little and easy assembly. So here I made 5 piece table which includes 2 walls, 2 supports and 1 top part. The fun part is you only required 3 steps to assemble the table.


Things I used:-

1) Cardboards
2) PVA glue
3) Craft knife
4) Ruler
5) Any paper for decoration, here I used Duct tape.

Thats all! 

Tips :-

1) The strength of table depends upon the quality of cardboard you are using. In this project I use 2 double sided cardboard which automatically makes it 4 single layer cardboard.

2) If you are using water based glue it is necessary to put equal wait on it.


5 pieces


2 side walls


Two support walls


Assembly step no-1


Step no- 2


Step no- 3


Table is all ready


After covering with colourful tapes 


Your table is all ready


Thanks for looking, Just let me know, if you have any suggestions for me.

Video made on  7th March 2018
Celebrating 2+ successful years of table


Sunday 24 January 2016

All purpose shelves


Hello crafters,

A very easy but huge space saver for my little bathroom. waterproof cardboard shelves for my bathroom's corner area. 


Materials I used:-

PVA glue/ hot glue gun
Cardboards, I used pampers cartons
Duct tape
Used polythene bags
Aluminium take away container lids
Door magnets 


Monday 11 January 2016

Kids Play mat 5 minutes DIY

Hello crafters!

Here I am again with my easy 5-10 minute craft idea. It was few days back when my friend's little angel visited our house and as kids gets super excited at new place, her excitement was also beyond control. she liked the colorful printouts of numbers that were sticking on my DS's black cardboard almirah so much that she wanted them on floor to walk on them. 
That's it!  I just had few minutes to fulfil her desire and convert those printouts into a play mat and thats how this play mat came into my crafting world.

When we go out we see high street shops are full of colorful and attractive play mats and its really hard to choose one. You just wanna buy them all for your little treasures but for obvious reasons, you cant!
But with this easy and cheap play mat idea you can change the prints and designs whenever you want.
So, lets make our very own personalised waterproof play mat for babies and toddlers.

Material that used ( whatever was readily available in my craft shelf)

> Printouts of numbers
> Transparent tape
> Scissors  
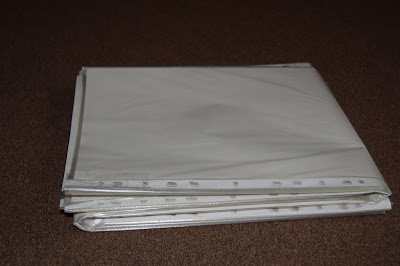
> Punch office pockets or paper pockets
> Duct tape or any other decorative tape (optional)


Well, all you have to do is put your printouts in the punch pockets arrange them in the desired order and stick them with the tape. VOILA!!! your play mat is all ready to play with.


I made alphabets and number play mat, you can use different cars or puzzles or your baby's favourite figures the options are endless, just play with your imagination.

You can even use plain paper pockets, I used the punched one because thats what I had available in my stock and I think sticking of punch pocket is easier then plain.


The best next part of this play mat is storage. The play mat becomes so tiny after you fold it that you can store it any where in the room.


Folding steps of my play mat are shown below. 


If you are using the punch paper pockets and want to hide those punch  holes, thats where you have to use the duct tape or any other decorative tape. I didn't use any decorative tape because I was happy with visible punch holes . A lovely gift for my friend's angel. My DS has outgrown for this mat but not for his LEGOs.


Thanks for looking my page, don't forget to checkout my rest of the crafts.